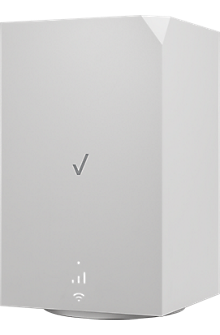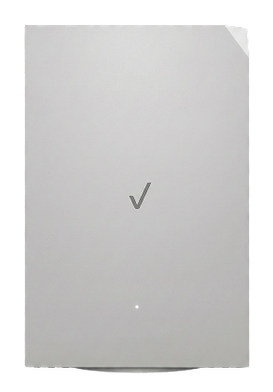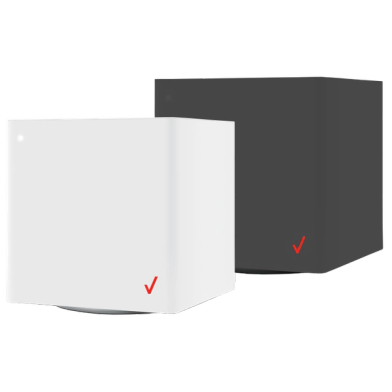


Verizon 5G Home Internet Gateway (ARC-XCI55AX) External Antenna Guide
Why you can trust Waveform
Waveform is the leading provider of solutions for improving cellular signal and connectivity. Our team of experts has decades of combined experience in wireless communication and remains committed to providing honest, data-driven reviews and recommendations. We rigorously test every product we sell and maintain complete editorial independence. No company can pay to influence our reviews or product ratings.
Read more about Waveform
- The Best External Antennas for the Verizon 5G Home Internet Gateway
- Why External Antennas Are Critical for Improving Data Rates
- Installing External Antennas to the Verizon 5G Home Internet Gateway
- Step-by-Step Guide to Installing Adapters for External Antennas
- Reassembling the Verizon 5G Gateway
- Positioning and Aiming MIMO Antennas
- Verizon 5G Home Internet Gateway Technical Specifications
- Supported Verizon bands
- Cellular Modem
- Wi-Fi
- Ports
- Other
- Other Helpful Resources
- Documentation
- A Helpful Guide on Installing and Maintaining U.FL connectors
- A Helpful Video of Disassembling the Verizon Gateway (ARC-XCI55AX) by Nater Tater
Looking to get the best possible data rates from your Verizon 5G Internet Gateway? You’ll want to purchase and connect external MIMO antennas to the device’s internal U.FL ports.
In this guide, we'll:
- Recommend the best external antennas to use.
- Show you how to access the internal U.FL antenna ports, and how to install adapters for external antennas.
- Explain how to aim the antennas for the best results.
NOTE: Our testing of this device is still ongoing. The best ports to use with external antennas for this Verizon 5G Internet Gateway aren’t yet determined, but we will continue to update the guide as we learn more.
Got the previous Verizon 5G Home Internet Gateway with SKU: ASK-NCQ1338 (as shown on the bottom of the device)? Check out our guide for that device here.
This guide is also applicable to the StraightTalk Home Internet Gateway with SKU: GPARFWA55V5CB by TracFone Wireless.
NOTE: To connect external antennas you'll need to open your Verizon 5G Home Internet Gateway. Read our instructions for doing so carefully to avoid damaging the device.
The Best External Antennas for the Verizon 5G Home Internet Gateway
Using an external MIMO antenna outside your building, pointed at the nearest tower, can help you get the fastest 4G LTE and 5G data rates possible.
The Verizon 5G Internet Gateway (ARC-XCI55AX) has seven internal U.FL ports for use with cellular antennas. You can either use four of their ports to connect a 4x4 MIMO antenna system to the device, or you can use all seven to connect an 8x8 MIMO antenna system.
Since an 8x8 MIMO antenna offers superior performance and would allow more of the internal cellular antenna ports to be used, we highly recommend our 8x8 MIMO antenna kit over our 4x4 MIMO antenna kits and over the Verizon 5G Internet Gateway's stock antennas.
Accessing the antenna ports does require some disassembly and we recommend being careful. If you damage the device and then later return it, Verizon may charge you a damage fee. Our instructions described later will guide you through how to connect and test antennas without damaging the device.
NOTE: The Verizon 5G Internet Gateway (ARC-XCI55AX) uses an electronic SIM, otherwise know as an eSIM or e-SIM. This means that the device does not contain a physical SIM card that could be swapped into a different cellular device.
We recommend two different MIMO antenna options, either an 8x8 and a 4x4 for use with the Verizon 5G Internet Gateway.
The easiest antenna choice for the Verizon 5G Internet Gateway is our QuadMini Duo Antenna Kit. With up to 5.2 dBi of omnidirectional gain and multiple mounting options, it is designed to be extremely simple to install outdoors or indoors, at home or in an RV. This kit has 8x8 ports and offers a superior performance to a 4x4 antenna.

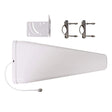
We do also have a 4x4 antenna option. Although the QuadPro Antenna Kit uses fewer ports than the 8x8 QuadMini Duo, it offers 9.1 dBi of directional gain. This is particularly important if you're on the edge of coverage, or have very weak signal. However, you will have to spend more time aiming the antenna.

QuadPro: High-Gain Directional 4x4 MIMO Antenna
Aim QuadPro at your nearest tower for blazing data, even at the edges of cellular coverage.
Why External Antennas Are Critical for Improving Data Rates
Most people think that external antennas primarily help you increase your data rates by increasing the signal strength. But that's not the case.
An increase in signal strength is often less important than other ways that external antennas help.
Here are the three main ways that external antennas help you increase your data rates:
-
They Improve Signal Quality
In 4G LTE and 5G networks, signal quality is measured as SINR (Signal to Interference plus Noise Ratio) or sometimes as RSRQ (Reference Signal Received Quality).
Improving signal quality has a huge impact on your data rates.
Higher data rates allow your hotspot to communicate using "higher order modulation schemes." That means they can use the same wireless spectrum to send more data per second.
However, there's one big caveat: In order to improve your signal quality, you need to both aim and shield your outdoor antenna properly. We talk more about this in the next section.
-
They Allow You To Connect On More Bands
Hotspots like the Verizon 5G Internet Gateway support a feature called "carrier aggregation."
Carrier aggregation allows the Gateway to connect on multiple cellular bands simultaneously.
The more bands you're connected on, the greater the bandwidth, and the higher your data rates.
However, many of the higher frequency bands aren't able to penetrate into buildings. Using external antennas allows you to access higher frequency bands, which are often less congested and offer higher speeds than lower frequency bands.
-
MIMO Isolation
MIMO (Multiple Input Multiple Output) technology uses signals traveling along multiple paths simultaneously, increasing both bandwidth and reliability in wireless connections.
MIMO isolation is the antenna's ability to handle several data streams at once, cleanly and without interference, leading to quicker data speeds and steadier connections
Our external antennas are specifically designed for superior MIMO isolation, and dramatically outperform standard built-in antennas found in most home devices.
This means you'll see a more reliable connection with enhanced bandwidth, ensuring smoother streaming, gaming, and browsing with minimal interruptions
Installing External Antennas to the Verizon 5G Home Internet Gateway
Before getting started, it's always a good idea to run a couple of speed tests indoors from a device connected to your Gateway's WiFi. The results will fluctuate a little, but this is the baseline you're trying to improve.
Once you've tested your baseline internet speeds, you're ready to install external antennas. The Verizon 5G Home Internet Gateway doesn't have any external cellular antenna ports, but it's possible to access the ports used by the internal cellular antenna to use with adapters for connecting external antennas.
In the next section of this guide, we'll show you how to open up your Gateway, connect adapters for external antennas, and close it back up.
Before you get started, you will need the following:
- A #1-size phillips-head screwdriver
- A thin prying tool or flat-head screwdriver
- Needle-nose pliers or tweezers
- A secure container to keep screws and small parts safe while you work
- Tape for labeling components. Painters tape works best.
- Four U.FL to SMA-Female pigtail adapters (included in our 4x4 External Antenna kits)
Important note:
Be careful not to damage your Verizon Home Internet Gateway while disassembling.
Waveform does not make any guarantees nor take any responsibility for damage caused to your unit when following these instructions. Please proceed at your own risk.
If you do decide to return your unit to Verizon, make sure to reconnect the existing internal antenna connectors before doing so.
Step-by-Step Guide to Installing Adapters for External Antennas
Step 1: Power off the Verizon 5G Internet Gateway and unplug the power cable.
Step 2: Place a piece of tape on the top cover of the Gateway, close to the side with the Verizon check-mark. This tape will be used to correctly orient the top cover when later reassembling the system.

Step 3: On the top of the device, remove the top cover by using a thin prying tool or flat-head screwdriver to apply an outward pressure underneath each corner of the top cover to gently unlatch each one of the four corners of the top cover.

Step 4: Remove the three #1 phillips-head screws located below the top cover that secure the outer cover to the inner enclosure.

Step 5: On the bottom of the device, remove the outer cover by using two prying tools to apply an outward pressure between the outer and bottom cover to gently unlatch the outer cover from the bottom cover.

Tip: Sliding both of prying tools into the same corner can help to unlatch both the center tabs and corner tab of the outer cover. Holding the outer cover in place can help keep it from slipping back onto the bottom cover.
Step 6: Once the outer cover is fully unlatched, slowly lift the outer cover away from the bottom cover to reveal the inner enclosure. As shown below:

Step 7: Rotate the inner enclosure to the side with a set of black cables connected to the circuit board by a series of small U.Fl connectors. These ports are labeled J0 through J7.

NOTE: While ports J0 through J6 are used for cellular antennas, J7 is used by the Gateway's GPS antenna and will stay connected to it's stock antenna.
Step 8: Using the follow guidelines, very carefully disconnect the assigned set of U.FL connectors using a prying tool or a pair of tweezers. Be very careful here as U.Fl connectors can be quite fragile. Make sure you're very gentle to avoid breaking the connectors:
Disconnect the cables for ports J1, J3, J4, and J5.
Tip: Unhook J1, J4, and J5 from their respective white cable clips for later use.
Tip: We've heard from our customer's that using port J0 instead of port J4 can often provide even faster data speeds for those whose local cell service is limited to 4G cell signals. Please feel free to test that combination as well!
NOTE: Our testing of this device is still ongoing. The best ports to use with external antennas for this Verizon 5G Internet Gateway aren’t yet determined but we have found that preliminary tests and the tests results from our customers showed success with these pairings. We will update the guide as we learn more!
Step 9: Once the desired U.Fl connectors are fully disconnected, use a small tweezer or needle-nose pliers to feed each of the loose cables into the open space above the top right of the circuit board.

Tip: Keeping these stock cables out of the way can help make placing the outer cover back onto the inner enclosure much easier.
Step 10: Route the U.FL-SMA pigtail adapters through the hole located on the top of the inner enclosure.

Tip: For Steps 10 and 11, individually routing and connecting each U.FL-SMA pigtail adapter in the order described below. This can help make managing and installing the cables much easier.
Route and connect J5, then repeat this process for J4, J3, and J1, in that order.
Step 11: Install the U.FL to SMA-Female pigtail adapters by very carefully aligning and pressing them down onto the ports you opened up in Step 7. A quiet "click" can often be heard once the connector is pressed down and fully connected.

Tip #1: The pigtail adapters used for ports J1, J4, and J5 can be hooked into the white cable clips opened in Step 5 to more securely hold them onto the circuit board.
Tip #2: Label the ends of the pigtail connectors with masking tape so you remember which pigtail adapter goes to which port. This will be important for users with 4x4 MIMO Antenna kits.
Tip #3: If you are struggling to get the pigtail connected, we recommend using a tweezers to spread the petals of the U.FL connector further apart, as shown in the image below:

Step 12 (Optional): If your time allows, test different cellular antenna port combinations to see if they can provide faster data speeds than those recommended in Steps 8 and 9.
To test these different cellular antenna port combinations, temporarily skip the reassembly process in Steps 11-14 and connect your MIMO external antennas to the newly installed pigtail adapters.
From here, you can follow the methods discussed in the next section of this guide to position and aim your MIMO antennas and find which combination provides you with the fastest data speeds possible.
Please let us know what works best for you so we can update the guide as we learn more!
Reassembling the Verizon 5G Gateway
Step 13: Feed the group of pigtail adapters through the outer cover and align the side of outer cover with the Verizon "checkmark" with the side of the inner enclosure with the antenna labelled "J3C".

Step 14: Press the outer cover firmly down to “click” it back into place against the bottom cover.

NOTE: The outer cover may get caught on the J3C antenna when moving it towards the bottom cover. Press softly upon the upper right side of the J3C antenna to allow the outer cover to safely pass over the J3C antenna. Refer to the image in Step 12 for additional context.
Step 15: On the top of the device, screw the three #1 phillips-head screws back onto the outer cover to secure it against the inner enclosure.

Step 16: Place the top cover back onto the outer cover by aligning the tape on top cover with the the Verizon check-mark side of the outer cover. Once aligned, firmly press down onto the sides of the top cover to click as many claps as possible into place.
A gap will need to be present on one corner of the top cover for the pigtail adapters to pass through. Remove the tape as necessary.
Tip: The wires of the pigtail adapters can be fed into the small grooves within the top cover to help it close even further. As shown below:

Congrats! Your Verizon 5G Internet Gateway should now be fully re-assembled with the pigtail adapters!
Step 17: Connect your external MIMO Antenna to the labeled pigtail adapters installed in your Gateway.
You will connect your adapters in according to the list and image below:


Congrats! Your T-Mobile 5G Internet Gateway is now connected to your more powerful MIMO External Antennas.
Positioning and Aiming MIMO Antennas
Positioning and aiming MIMO antennas is crucial to getting the best performance to your Verizon 5G Internet Gateway, or indeed any other hotspot.
We've actually compiled a detailed QuadPro and QuadMini instruction manual to accompany our own MIMO Antenna Kits, where we go into depth on the best ways to aim the antennas.
The goal is to find the best location and direction for the antenna(s), to maximize data rates to the Verizon Gateway. It can take a little patience, but can have a huge impact – it’s worth a bit of extra effort!
Connect your MIMO external antennas to your modified Verizon 5G Internet Gateway via the newly installed pigtail adapters, and go outside with your "test-rig".
With each location and direction you try, run a couple speed tests, and make a note of the results. Here are all the locations and directions where we recommend testing your MIMO antenna:

Pro tip: Don’t just go to the highest point of the roof! While signal is generally stronger the higher you go, there’s also often more interference. We’ve found it’s often better to mount the antenna(s) on the side of the building where the structure can shield the antennas from interference.
Once you've found the position which gets you the highest data rates to the Verizon Gateway, that's where you'll want to install the MIMO antenna. Go ahead and mount the antenna, run cables inside, connect everything up, and enjoy superior data rates!
Verizon 5G Home Internet Gateway Technical Specifications
Supported Verizon bands
- 4G LTE: B2, B5, B13, B48, B66
- 5G: n2, n5, n48, n66, n77
Cellular Modem
- Model: MediaTek MT6890
- MIMO Support: 4x4 w/ internal antennas or external antennas
- LTE-A Carrier Aggregation: Yes (Uplink)
- LTE Performance Category: Cat 18
- Max Theoretical Speeds: 600 Mbps Download, 75 Mbps Upload
- Max Verizon 5G Home Internet Data Plan Speeds:
- Basic: 300 Mbps Download / 50 Mbps Upload
- Plus: 1000 Mbps Download / 50 Mbps Upload
Wi-Fi
- Technologies: Wi-Fi 6 - 802.11 a/b/g/n/ac/ax
- Bands: Simultaneous 2.4 GHz and 5 GHz
Ports
- Cellular Antenna Ports: 7x internal U.FL
- Ethernet Ports: 2x LAN
Other
- Power: AC power only (no battery)
Other Helpful Resources
Documentation
A Helpful Guide on Installing and Maintaining U.FL connectors
A Helpful Video of Disassembling the Verizon Gateway (ARC-XCI55AX) by Nater Tater
Thank you NaterTater for your assistance with testing this device.
About the authors
 Austin Rutten
Austin is a Product Manager at Waveform, where he leads technical product development, launch execution, and documentation across the company’s connectivity portfolio. His work spans Waveform Internet, cellular antennas, networking hardware, and the operational systems that support them. With a background in applied mathematics and physics, Austin brings a systems-driven approach to product management — combining technical rigor, customer insight, and structured execution to turn complex connectivity challenges into products that are clear, reliable, and easy to support. He specializes in the parts of product development where technical detail and user experience intersect: performance validation, documentation, troubleshooting, and launch coordination. His focus is on building products that not only work well, but are understood well.
About Waveform
At Waveform we help enable reliable cellular connectivity, everywhere. Trusted by thousands of consumers as well as NASA, Tesla, Stanford, and more. Learn more about Waveform
Suggested articles
See All Guides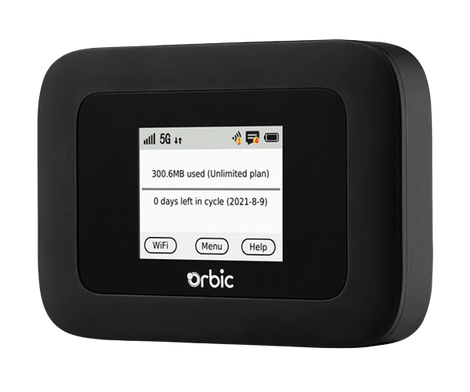
Verizon Orbic Speed 5G (R500L5) Optimization Guide
By Austin Rutten · 4 min read