


How To Band Lock The Netgear Nighthawk M1 (MR1100)
Why you can trust Waveform
Waveform is the leading provider of solutions for improving cellular signal and connectivity. Our team of experts has decades of combined experience in wireless communication and remains committed to providing honest, data-driven reviews and recommendations. We rigorously test every product we sell and maintain complete editorial independence. No company can pay to influence our reviews or product ratings.
Read more about Waveform
If you're looking to squeeze out the very best data rates from your Netgear Nighthawk M1 (MR1100), then band locking is key.
Unfortunately the Netgear Nighthawk M1, like most hotspots, doesn't always pick the best performing combination of bands.
Fortunately, using a telnet console and entering AT commands makes it possible to band lock the Netgear Nighthawk M1.
This can get a little technical, but we'll keep it as digestible as possible! Read on for step-by-step instructions.
What is Band Locking and Why Should You Do It?
The main reason you might want to band lock your Netgear Nighthawk M1 is to get better data rates.
The Netgear Nighthawk M1 doesn't always pick the best combination of bands to connect on to get the fastest data rates. This problem isn't unique to this Netgear device - almost every hotspot has the same issue.
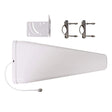
Unfortunately, Netgear hasn't make band locking very simple. So if you're looking to boost your data rates, and you're not tech-savvy, you might want to start by reading our external antenna guide for the Netgear Nighthawk M1 (MR1100). External antennas can help you access stronger, clearer signal and connect on more bands, and can have a huge impact on data rates.
If you've already got external MIMO antennas, or you know that the Netgear Nighthawk M1 isn't connecting on optimal bands, then band locking is an excellent way to optimize your connection.
Band-locking isn't something we'd recommend for everyone, but if you're comfortable working in a command shell, it can be a big help. Read on for step-by-step instructions
Tip: Test Bands Individually and Together
The idea behind band locking is that you test every different frequency band being received by your Netgear Nighthawk M1, and then lock the set of bands that gets you the fastest data rates.
Each frequency band will work at a different data rate, depending on the bandwidth of the band and how congested the tower is on that frequency.
Generally speaking, higher frequency bands (like 1900 MHz and 2100 MHz) travel less far and penetrate building materials less well than lower frequency bands (like 700 MHz and 800 MHz). Since they don't penetrate buildings as well, higher frequencies also tend to be less congested with users as well.
This isn’t always the case though, sometimes a lower frequency band may have better data rates, depending on your location. The only way to find out is to test!
The Netgear Nighthawk M1 (MR1100) is able to "carrier aggregate" - which means it can connect on multiple bands simultanoeously. So, in addition to testing individual bands, you can also test combinations of the best bands to see which gets you the fastest throughputs.
Note: This method was tested using a Netgear Nighthawk M1 (MR1100) running firmware version NTG9X50C_12.06.03.00.
Step 1: Open a Telnet Session with Your Netgear Nighthawk
Tether your Nighthawk M1 to a Windows computer
Connect your Nightthawk M1 to a Windows computer via the USB cable. This only works on Windows computers, and via the USB connection. Ethernet and WiFi connections will not work for this.
Enable USB Tethering on your Nighthawk. This is done by navigating to "Mobile Router Setup" on the web interface or mobile app, and setting the "Use USB port for" setting to "Charge + tether."
Use Putty to open a Telnet session with your router
Download Putty and install it on your Windows computer. The download page can be a little confusing, so here's a direct download link for the stable release 0.74. Alternatively, download the newest stable release.
Once installation is complete, open Putty and enter the IP-address and Telnet port in the "Session" destination. By default these are as follows:
- IP-address: 192.168.1.1
- Telnet port: 5510
Set connection type to "Telnet", and click Open to open the telnet session.
Once it's connected, you should see a black console. This is where you'll enter the AT commands, which we'll outline below.
Step 2: Use AT Commands to Display Network Information
Start by entering the following command to display information about the connected network:
> AT!GSTATUS?The console should print something like this:
AT!GSTATUS?
!GSTATUS:
Current Time:  740              Mode:        ONLINE
System mode:   LTE              PS state:    Attached
EMM state:     Registered       Normal Service
RRC state:     RRC Connected
IMS reg state: No Srv

PCC:
LTE band:         B7
LTE bw:           15 MHz
LTE Rx chan:      3275
RSSI (dBm):       -48.5
RSRP (dBm):       -75.9
RSRQ (dB):        -9.8
RSSNR (dB):       14
Tx Power (dBm):
LTE Cell ID:      XXXXXX
Physical Cell ID: XXX
TAC:              XXXXX

OK
There's some really useful information here that can be really helpful in positioning and aiming MIMO antennas connected to your Nighthawk! Let's unpack it before continuing:
- LTE band denotes the band the device is currently connected to. This is what we'll be changing.
- LTE bw is the bandwidth of the connected band. Higher bandwidths will usually result in higher data rates. Most LTE bands max out at around 20 MHz.
- RSRP (dBm) is the received LTE signal strength. Generally doesn't require much attention as long as it's above -110 dBm (closer to zero).
- RSSNR (dB) is the received LTE signal quality. This is arguably the most important measurement here. If you're optimizing antenna position, try get this as high as possible! Typically anything above 3 dB is okay, 30 dB is the maximum.
- Physical Cell ID is an identifier for the tower you're connected to. It can be tricky to match this to towers in the real world, but our article on how to Locate Nearby Cell Towers should be helpful.
Step 3: Use AT Commands to Band Lock Your Nighthawk
Displaying a list of currently selected bands
Enter the following command to display a band selection list and all connected bands on your router.
> AT!BAND=?The console should print something like this:
Index, Name,                  GW Band Mask      L Band Mask       L ext Band Mask
00, Auto,                     0002000004C00000  000001A0080800C5  0000000000000000
01, WCDMA All,                0002000004C00000  0000000000000000  0000000000000000
02, LTE All,                  0000000000000000  000001A0080800C5  0000000000000000

OK
This will act as your "key" to entering band selections in the next step.
Adding band selections
To add a band selection, enter the relevant command from the list below. Keep in mind, the Nighthawk M1 only allows up to eight band selections at a time, meaning a maximum of eight index numbers.
To help you understand what the AT commands you're entering actually mean, here's a breakdown of each part of the command AT!BAND=3,"LTE B2",0,2.
Command   | Index number | Name       | WCDMA hex code  | LTE hex code
AT!BAND=  | 3            | "LTE B2"   | 0               | 2
The command above would create a new index line in our example (using an existing index number would overwrite that index line), it would name that new band selection "LTE B2", select no WCDMA 3G bands (you likely won't want to select any 3G options, unless LTE is not available in your area), and select LTE band 2.
Here are the AT commands for each band supported by the Netgear Nighthawk, simply replace with the index line number you'd like to create or overwrite in each instance, keeping in mind the Nighthawk M1 allows a maximum of 8.
- Select Band 2:
> AT!BAND=<number>,"LTE B2",0,2- Select Band 4:
> AT!BAND=<number>,"LTE B4",0,8- Select Band 5:
> AT!BAND=<number>,"LTE B5",0,10- Select Band 12:
> AT!BAND=<number>,"LTE B12",0,800- Select Band 14:
> AT!BAND=<number>,"LTE B14",0,2000- Select Band 17:
> AT!BAND=<number>,"LTE B17",0,10000- Select Band 29:
> AT!BAND=<number>,"LTE B29",0,10000000- Select Band 30:
> AT!BAND=<number>,"LTE B30",0,20000000- Select Band 41:
> AT!BAND=<number>,"LTE B46",0,010000000000-Select Band 66:
> AT!BAND=<number>,"LTE B46",0,200000000000To add a combination of bands, you'll need to calculate the LTE hex code for that combination, by using an NV Calculator like this one.
Set the app to hexadecimal and select the LTE bands you want to use, via the menus at the bottom of the screen. The app will provide you a number, this is the LTE hex code that you'll enter in the last position of your AT command.
Here are some multi-band AT commands, as before, you'll replace with the index line number you'd like to create or overwrite.
- Select Bands 2 and 12:
AT!BAND=<number>,"B2 + 12",0,0802- Select Bands 4, 5 and 17:
AT!BAND=<number>,"B4 + B5 + 17",0,010018- Select Bands 2, 4, 5, 12 and 30:
AT!BAND=<number>,"B2 + B4 + B5 + 12 + B30",0,2000081ARemoving band selections
If necessary, you can disable bands with the following command, by setting both the WCDMA and LTE hex codes to zero for a given index line. Here, you'll replace with the relevant index line number, and with that line's name.
> AT!BAND=<number>,"<name>",0,0After adding or removing bands, go ahead and check the list with the AT!BAND=? command, to ensure your changes have taken effect.
Enjoy
Once you've done this, reboot your Nighthawk hotspot and run the AT!GSTATUS? command again, to confirm which band(s) it is connecting over, as well as how your signal measurements look.
Finally, run a speed test to check your data rates. if you've selected the best bands to lock on to, then you should hopefully see an improvement in data rates. If you don't see an improvement in data rates, try locking to a different combination of bands.
Once you're happy that you've found the best bands for your router to use, bask in the glory of having successfully "hacked" your way to better data rates!
About the authors
 Marcus Carstens
Marcus is the VP of Product at Waveform, where his team runs Waveform Internet, builds the company's 5G antennas and accessories, manages the third-party products it sells, develops services like plug-and-play private 5G, and writes the documentation that supports it all. He came to connectivity from an unlikely direction, with a degree in biodiversity and ecology, which turns out to be good training for making sense of messy, interconnected systems. He spends most of his time on the parts of a product people feel but rarely think about: whether the connection holds, whether the setup is easy, whether the whole experience earns trust. His approach is craft-first, built on a stubborn belief that getting the small things right is what keeps customers around.
About Waveform
At Waveform we help enable reliable cellular connectivity, everywhere. Trusted by thousands of consumers as well as NASA, Tesla, Stanford, and more. Learn more about Waveform
Suggested articles
See All Guides
How To Band Lock ProLink
By Marcus Carstens · 6 min read

The Definitive Guide to Multi-WAN Internet
By Marcus Carstens · 52 min read